Deckbuilding
Ironclad Perfected Strike deck guide
Fill the deck with Strike-tagged cards, scale with Perfected Strike, use exhaust and draw to thin for consistent burst. Core picks, relic priority, and FAQ.
The Strike deck can be summed up in one line: fill your deck with Strike-tagged cards, scale damage with Perfected Strike, and use exhaust and draw to thin the deck for consistent high burst every turn. Kill enemies fast so you don’t need to block.
The build is straightforward. The ceiling is landing the rare Hellraiser, which fixes both draw and energy. Add Pommel Strikes and a bit of energy and you can go infinite. It’s a fast, high-risk style—wins and losses both come quickly—and a solid early-game unlock path.
Core card picks
(1) Damage
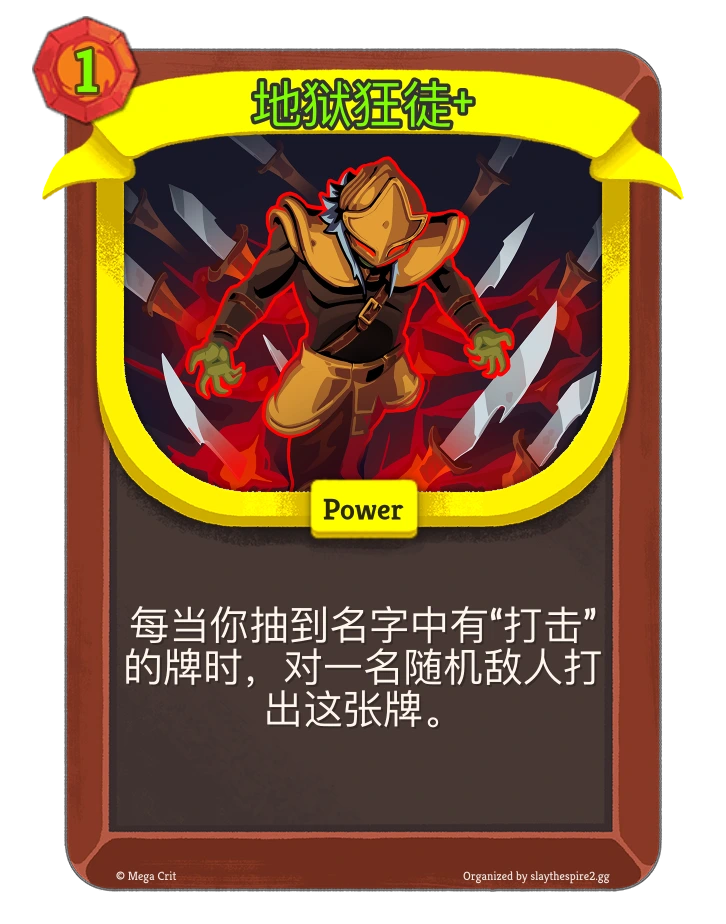
① Hellraiser
Pick priority ★★★★★ · Upgrade priority ★★★★★
The key card STS2 added for Strike decks. It fixes draw and energy: base 2 cost, automatically plays drawn Strike-tagged cards without spending energy; upgraded it’s 1 cost. Must-pick core.
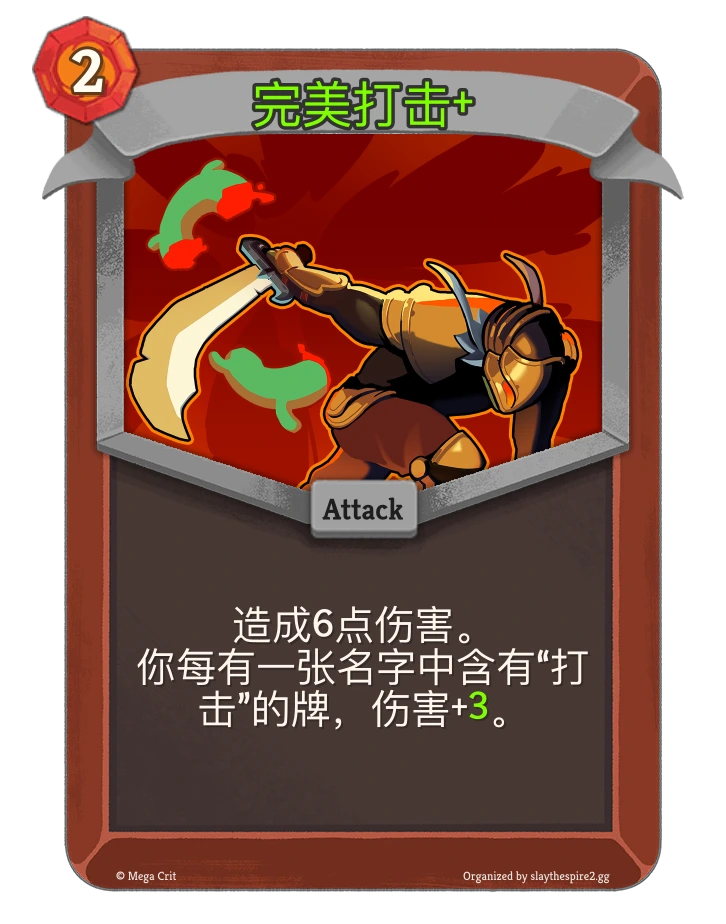
② Perfected Strike
Pick priority ★★★★★ · Upgrade priority ★★★★★
+2/+3 damage per card with “Strike” in the name (including exhausted cards). Perfected Strike itself has the Strike tag, so each copy adds another scaling source. Snowballs hard—prioritise at campfires. Common, so you see it often; even without Hellraiser you can clear low ascensions on Perfected Strike alone.
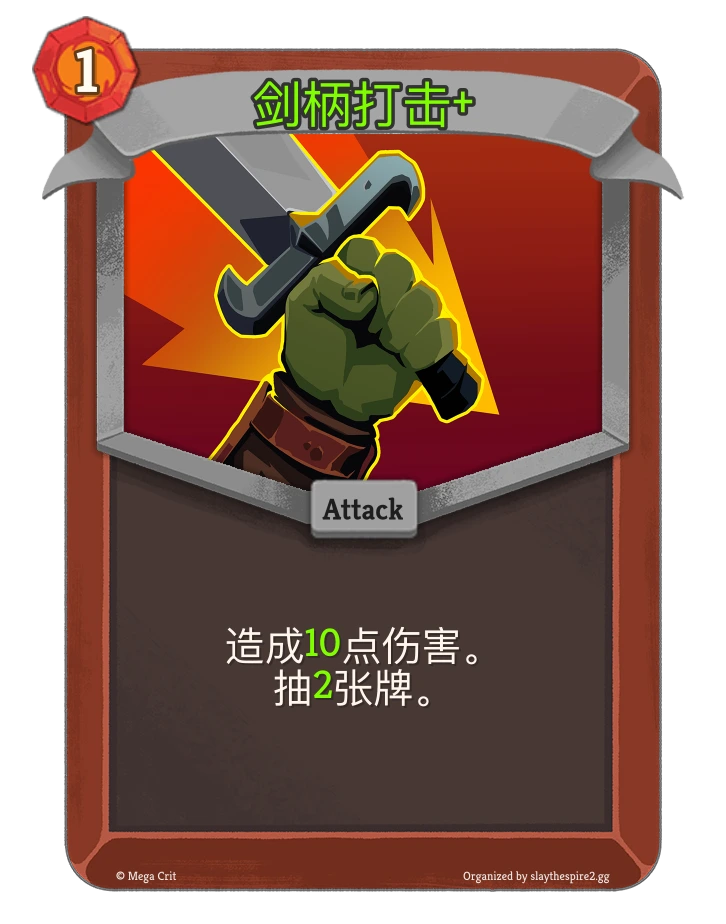
③ Pommel Strike
Pick priority ★★★★★ · Upgrade priority ★★★★★
Base: 9 damage, draw 1. Upgraded: 10 damage, draw 2—a big jump. Strong Strike card; with Hellraiser you can stack Pommels for loops or infinite. Good damage and draw in one.
④ Twin Strike
Pick priority ★★★★ · Upgrade priority ★★★
1 energy, hit twice (5 each, more upgraded). Cheap and high frequency, fills energy gaps and adds Strike count. Especially good when Act 1 boss is the Slime; Slippy is rough for this deck.
⑤ Setup Strike
Pick priority ★★★★ · Upgrade priority ★★★
1 cost, 7 damage, 2 temporary Strength (9 damage + 3 Strength upgraded). Stronger with Hellraiser; after setup it’s steady scaling. Take 1–2.
⑥ Pillage
Pick priority ★★★★★ · Upgrade priority ★
1 cost, 6 damage, then draw until you hit a non-Attack. In this deck attacks dominate, so you often draw several. Pairs well with Hellraiser—one card can kickstart the engine.
⑦ Primal Force
Pick priority ★★★★ · Upgrade priority ★★
Not an Attack or Strike, but still a solid early pick. Many Act 2 enemies care about “Boulder”; this gives you an answer and some scaling.
⑧ Seek Strike / Ultimate Strike
Pick priority ★★★ · Upgrade priority ★★
Seek Strike is discover-from-three; better in smaller decks. Ultimate Strike is a straight upgrade to Strike—1 cost, 14 damage (5 more than upgraded Strike).
(2) Block
① Second Wind
Pick priority ★★★★★ · Upgrade priority ★★★★
Core in belly decks and strong here too. Clears clutter and status from elites/bosses. Worth a slot.
② Crimson Mantle
Pick priority ★★★★★ · Upgrade priority ★★★★
1 cost power: lose 1 HP, gain 8/10 Block. Great rate; cuts Act 3 chip a lot. Downside: upgrade doesn’t make it innate, so bottom-decking hurts.
③ True Grit
Pick priority ★★★★ · Upgrade priority ★★★★
Exhausting Strikes no longer lowers Perfected Strike damage in STS2, so True Grit is safe. Use it on status or low-value Strikes to speed up the engine.
(3) Draw & cycle
① Stoke
Pick priority ★★★★★ · Upgrade priority ★★★
New rare in STS2: exhaust your whole hand, draw that many. No net loss, thins the deck, and can exhaust itself. Often one card is enough to go off.
② Burning Pact
Pick priority ★★★★★ · Upgrade priority ★★★
1 cost, draw 3. In this deck the downside is tiny. Strong exhaust + draw; was already a staple in STS1. Uncommon, so easier to find than rares.
③ Offering
Pick priority ★★★★★ · Upgrade priority ★★★★★
Lose 6 HP, draw 3/5, gain 2 energy. One of the best cards in the game. Prioritise at campfires.
Relic priority
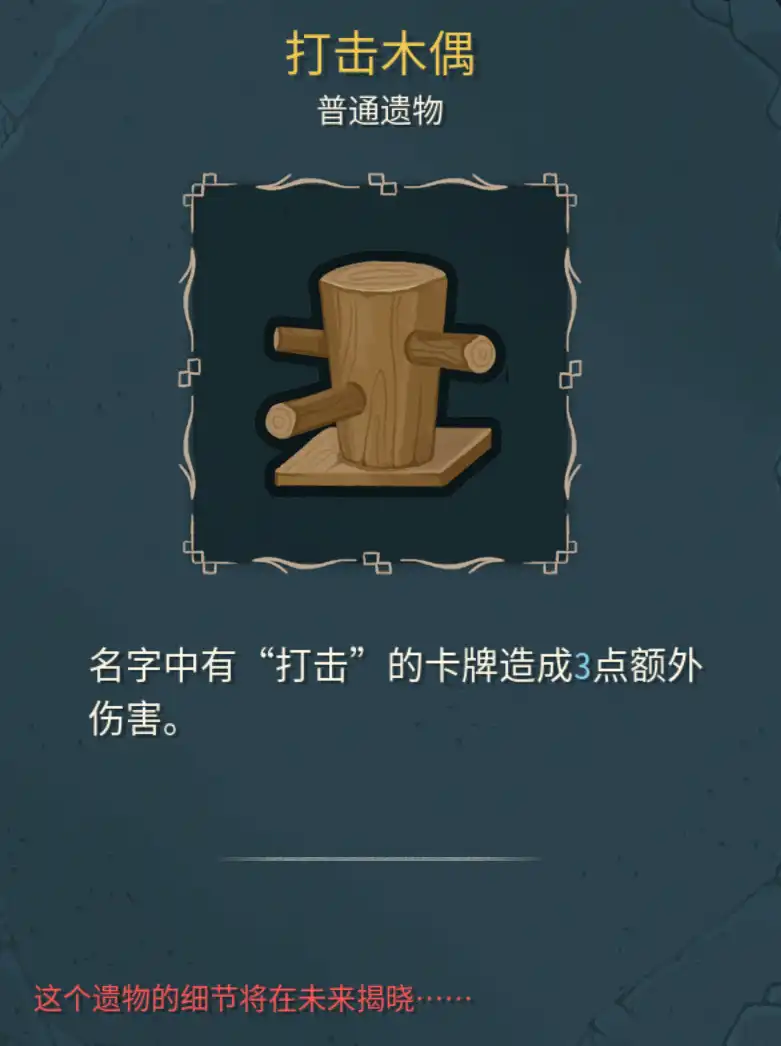
① Strike Dummy
Signature relic for Strike decks. +3 damage to all Strike cards, always on. Feels great.
② Ornate Bracelet
Nornopeep’s relic: enchant 3 Attacks with Swift 3; when played, draw 3. With Hellraiser, this makes the engine start very fast.
.webp)
③ Per’s Hyperplasia
More Strikes = more Perfected Strike damage. Without Hellraiser you can still lean on cloning Perfected Strike. With this relic, camp for duplicates.
④ Ceremonial Cloak / Music Box
Strike decks are block-light. Ceremonial Cloak’s Intangible helps a lot for a small max-HP cost. Music Box fits the deck: playing Attacks adds a temporary copy, raising Strike density; exhausting them is fine.
FAQ
① Which boss is worst for this deck?
Act 3’s Experiment. Three phases, so you can’t one-turn it like many others. Phase 3 has Judgment; Intangible’s damage cap makes burst-heavy decks more likely to die.
.webp)
Related: Cards, Relics, Characters.